 PickGlobe

Ever ordered your usual size and found that the shirt fits your shoulders but not your chest, or the pants fit your waist but pull across your hips? The problem may not be your measurements. It may be where you measured, how tightly you held the tape, or which size chart you used. This guide is for anyone measuring at home before ordering clothes online. It is general information, based on three brands' own measuring instructions, and a particular brand's own instructions always come first.
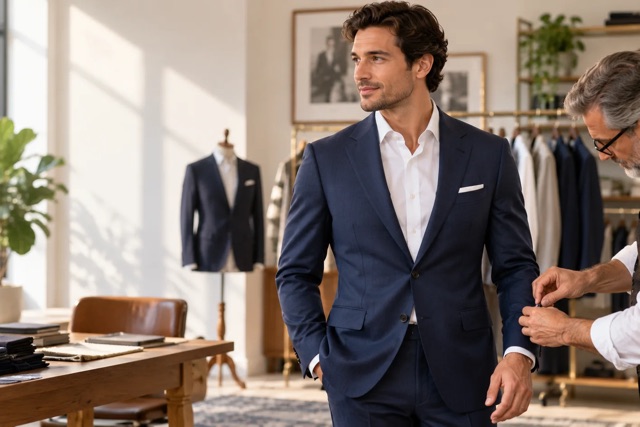
Illustration: AI-generated, cropped from the supplied header picture. It is not a photograph of a real person.
Quick answer
- Use a flexible tape against your body or thin, fitted clothing, held level.
- Chest or bust: around the fullest part, passing under the arms and across the shoulder blades.
- Natural waist: bend gently to one side and measure at the crease that forms.
- Hips and seat: around the fullest part of the hips and seat, standing relaxed.
- Then compare all three numbers with the exact brand's size chart: they describe your body, not the garment.
📏 Before you start: a 60-second setup
You will need a soft tailor's tape, a mirror, and somewhere to record your numbers. A friend can help you check that the tape stays level across your back. No flexible tape? A non-stretch string marked where it meets, then measured against a ruler, is a common workaround; avoid stretchy yarn or an elastic tape. Remove bulky layers, stand comfortably, and record inches or centimeters consistently (1 inch is 2.54 centimeters).
Where exactly does the tape go?
| Measurement | Place the tape | Common mistake | Useful for |
|---|---|---|---|
| Chest / bust | Around the fullest part of your chest or bust, under the arms and across the shoulder blades, firm and level | Measuring only the front, or letting the tape sag at the back | Shirts, dresses, jackets |
| Natural waist | At the crease made when you bend gently to one side, then stand and measure around at that level | Assuming your pants waistband marks your natural waist | Dresses, tailored tops, bottoms |
| Hips / seat | Around the fullest part of the hips and seat, standing relaxed with feet about shoulder-width apart | Measuring at the hip bones instead of the widest point | Pants, skirts, dresses |
Bra sizing needs extra measurements and brand-specific guidance that this guide does not cover.
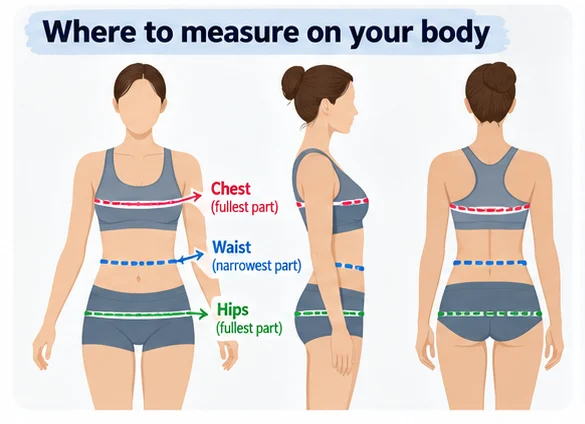
Illustration: AI-generated, to show where each measurement is taken. It is not a photograph of a real person.
1. Measure your chest or bust
Wrap the tape around the fullest part of your chest or bust. Patagonia says to relax your arms and measure around the fullest part; L.L.Bean says to measure just under the arms and across the shoulder blades, holding the tape firm and level. Check the position in a mirror so that it does not sag at the back.
2. Find and measure your natural waist
Patagonia says to bend slightly to one side to find your natural waist, which is the crease created by bending, then stand upright and measure around your body at the crease points. L.L.Bean also asks for the natural waistline, and for belts says to order the same size as your pants waist size and to go up a size if you are between sizes. Your natural waist can sit higher than the waistband of your favorite jeans, so do not move the tape down to match your pants.
3. Measure your hips at the widest point
Patagonia says to stand relaxed with feet shoulder-width apart and measure around the fullest part of your hips and seat. L.L.Bean says to measure around the fullest point of the seat while standing. A mirror helps here: a tape that rides up behind you gives a smaller, misleading number.
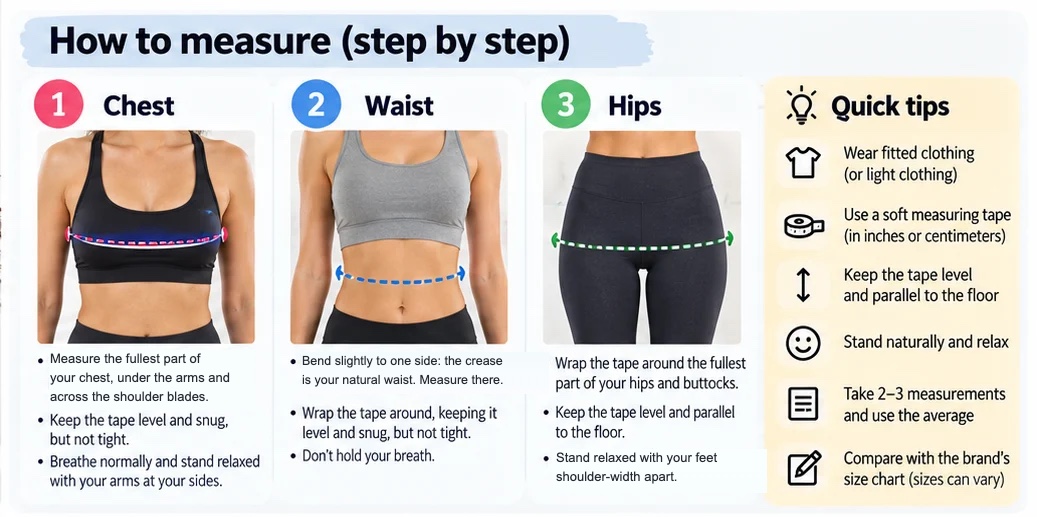
Illustration: AI-generated. We corrected its text to match the brands' instructions (under the arms and across the shoulder blades for the chest, the bend-to-the-side crease for the waist, and feet shoulder-width apart for the hips). The quick tips panel is general advice. It is not a photograph of a real person.
What to check before you order
- Which measurements the brand asks for: some charts want only chest and waist, others hips too.
- Whether the chart lists body measurements or garment measurements.
- Whether the size is picked from chest, waist or hips for that garment.
- Whether the brand says what to do between sizes.
⚠️ Five mistakes that throw off your numbers
- Pulling too tight: the tape should be snug, not compressing skin or fabric.
- Measuring over a sweatshirt: thick clothes add extra circumference.
- Tilting the tape: check the back as carefully as the front.
- Changing your posture: do not suck in, flex or stand unnaturally straight.
- Trusting one reading: measure twice, and take a third reading if the first two disagree.
The first four are general advice, and the last is common practice rather than a rule from the sources we read.
Body measurements vs garment measurements: why it matters
Patagonia states that the measurements on its size chart are body measurements. A body waist of 30 inches does not mean every pair of pants should measure 30 inches around the waistband, because clothing can include ease (extra room), stretch and different rise positions. A brand's body size chart describes the person, and a garment measurement chart describes the finished item, so they are not interchangeable.
Brands also pick the size differently. Patagonia says chest is usually the best size predictor for tops, but if your hip measurement is larger, consider the size indicated for your hips. For bottoms it says hips are usually the best predictor, but if your waist measurement is larger, consider the size indicated by your waist.
For example, suppose your measurements are chest 38 in, waist 31 in, hips 40 in. These are sample figures, not a universal size. Compare each number with the exact brand and garment chart, and if the chest suggests one size and the hips another, consider the cut, the fabric stretch and which area is hardest to alter. Our guide to reading clothing size charts explains the next step.
📝 Copy-and-save measurement card
| Measurement | Your number | Date |
|---|---|---|
| Chest / bust | ______ in / cm | ______ |
| Natural waist | ______ in / cm | ______ |
| Full hips / seat | ______ in / cm | ______ |
What we could not confirm
- The three sources are brand size guides (Patagonia and L.L.Bean), not independent standards. Other brands may measure differently.
- Breathing normally, the string workaround, wearing thin fitted clothing and measuring twice are common practice, not quotes from these pages.
- The step-by-step illustration supplied with the draft said to stand with feet together for the hips and to find the waist at its narrowest part, and put the chest tape across the nipples. Those lines do not match the Patagonia and L.L.Bean pages, so we edited the picture's text. Its "Quick tips" panel (wear fitted clothing, take two or three measurements and use the average) is general advice.
- We have not tested these methods ourselves, and this is not tailoring or medical advice.
Related guides
- How to read clothing size charts online
- Buying a suit online: sizing and fit
- Buying children's dresses online: sizing and fabric
- How to prevent clothes from shrinking
The takeaway: a good fit starts with three honest measurements, a level tape and the specific garment's size guide, not a size label you happen to own. Keep your numbers handy for your next online order and remeasure when needed.
Last checked: 23 October 2026. Sources: Patagonia, Women's Size & Fit (no date shown); Patagonia, Men's Size & Fit (no date shown); L.L.Bean, Sizing Charts (no date shown). The article draft and illustration were supplied by the site owner; we checked each measuring claim against these pages.